
What is Paxum?
Paxum is a quick and hassle-free payment option offered by TrafficJunky, allowing you to make payments through TrafficJunky’s Campaign Manager. Doing so allows you to enjoy a maximum of 5-hour processing time as well as to connect your Paxum.com and TrafficJunky accounts for ease of future payments.
Can you send wire transfers directly from Paxum Bank?
To make payments timely, convenient, and hassle-free, TrafficJunky encourages advertisers to make payments through TrafficJunky’s Campaign Manager, which will direct you to the Paxum.com payment gateway. This process not only has the least chance of error, but it also provides you with a maximum 5-hour processing time to reflect payments in your accounts’ funds. Learn more about Paxum and how to create your Paxum account.
How to set up your TrafficJunky Account to Receive Paxum Payments?
You will need to link your TrafficJunky account with the Paxum email if you want to successfully make a Paxum payment; the email added should be the one associated with your Paxum account. Now, let’s help you add an email that you want to use to make your payment.
- Login to your TrafficJunky account
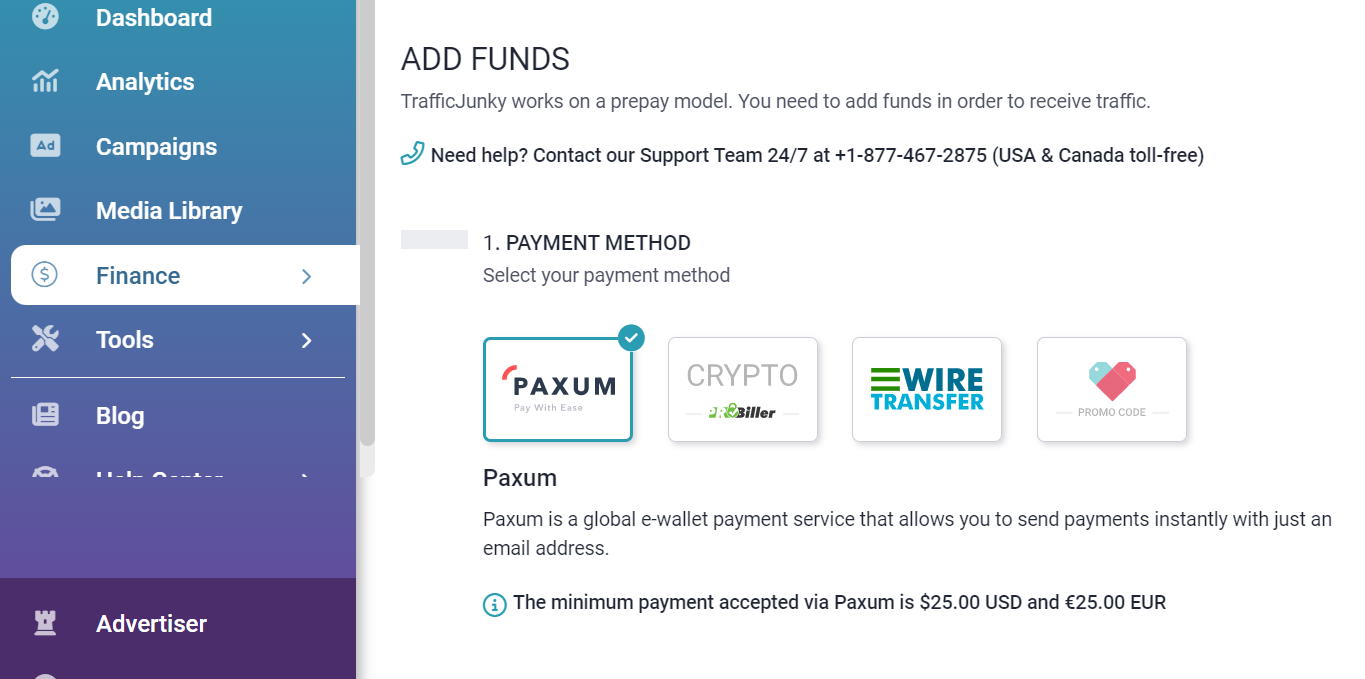
- Find the Add Funds page by clicking on Account Funding under the Finance section of the sidebar.
- Select Paxum as the payment method.
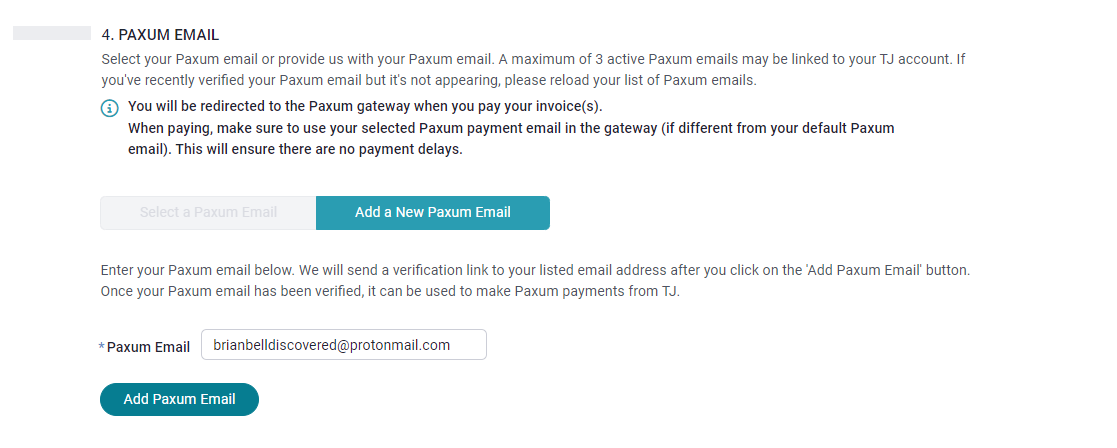
- Scroll down to the section called Paxum Email. The option, Select a Paxum Email, will be greyed out if you have not added a Paxum email to your TrafficJunky account.
- Click Add a New Paxum Email and enter the email you want to use to make your payment – the email associated with your Paxum account- in the Paxum Email field and click Add Paxum Email.
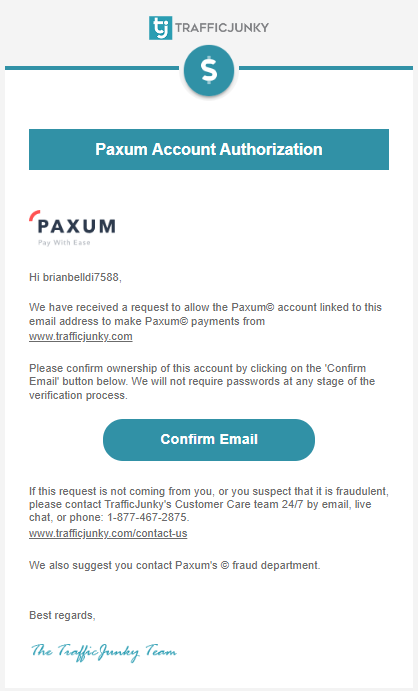
- You will receive a Paxum Account Authorization Email. After you open this email, click Confirm Email, and you will be redirected back to the Add Funds page.
- You will also receive a Paxum Account Confirmation email to confirm that your Paxum email has been linked to your TrafficJunky account.
- Submit your Paxum Payment
Please note that you can add a maximum of three active Paxum emails to a single TrafficJunky account.
Didn’t receive your Paxum Account Authorization?
If you don’t receive the Request to Link Paxum Account email or the Paxum Account Authorization email, click Resend Verification at the bottom of the Add Funds page.
Note: You can only opt to resend the verification once. If you do not receive your authorization emails after attempting to resend your verification, please reach out to support@trafficjunky.com. Our customer care team will be happy to assist you.
How to complete payment via Paxum?
Now that you’ve linked your TrafficJunky account and the email you want to use when making Paxum payments, your TrafficJunky account is ready to receive funds. Complete a Paxum payment through the following steps.
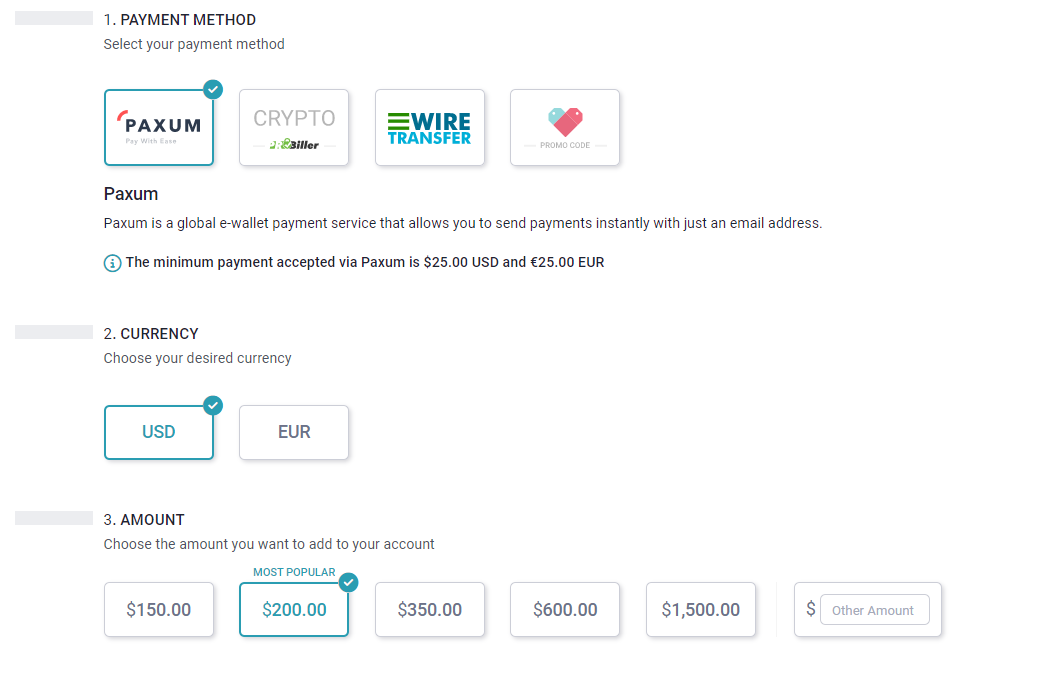
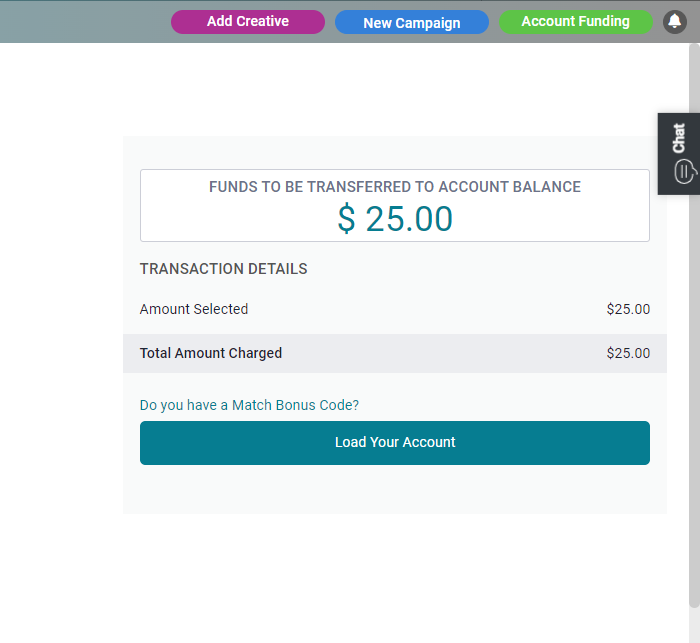
- Go to the Add Funds page and select Paxum as the payment method.
- Choose the currency you wish to make your payment in and enter the amount you wish to pay or select one of the suggested amounts.
- Select your Paxum email.

- Fill out your account information if you have not already.
- Click Load Your Account.
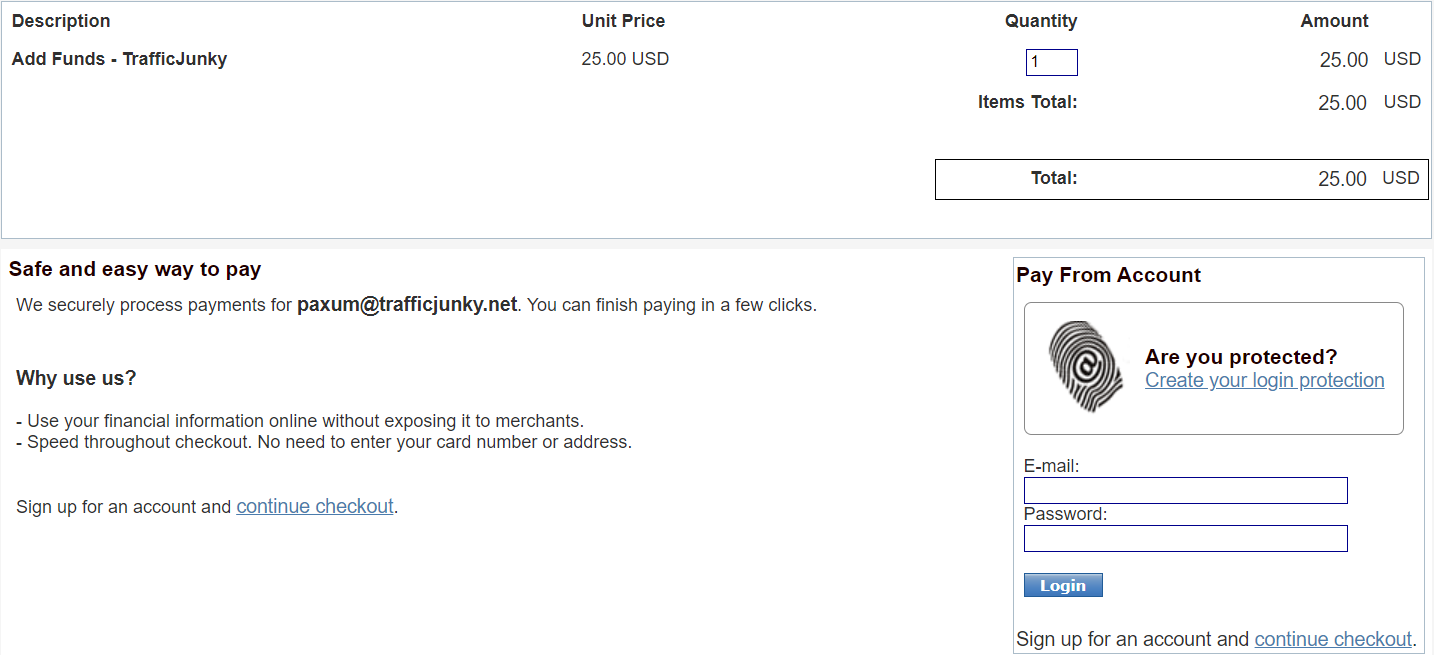
- You will be redirected to the Paxum gateway. Please login using your Paxum credentials to complete the payment. Use the same Paxum email as selected on the Add Funds page.
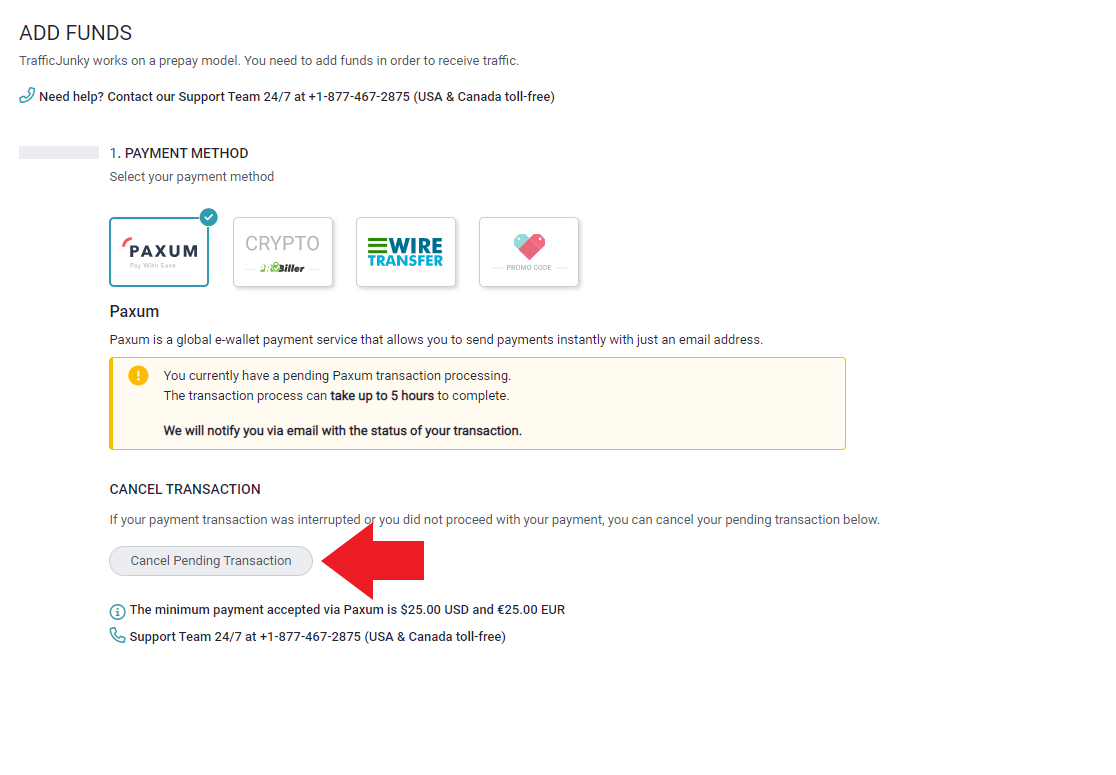
How to cancel your Paxum Payment
You may cancel a pending Paxum transaction by doing the following:
- Open the Add Funds page and select Paxum as your payment method.
- Click Cancel Pending Transaction.
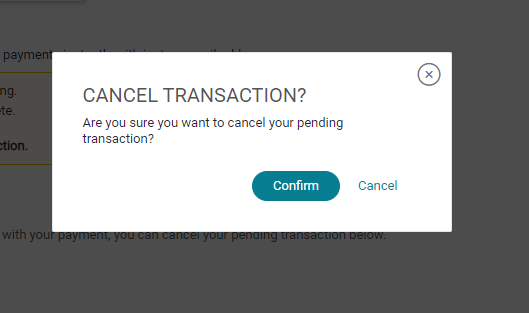
- Click Confirm on the Cancel Transaction pop up.
- Now you can simply refresh the page and make your next payment.
Questions, comments, concerns? Don’t hesitate to reach out to support@trafficjunky.com