Chances are you received an email explaining your recently uploaded TrafficJunky ad was rejected. Here’s how to verify why.
How To Check Your Banner Rejection Reason
Chances are that if you’re reading this article, your banner ads have been rejected. Don’t worry, it happens to everyone.
We’re here to help you understand why, so you can re-upload compliant ads in the future!
For you visual folks, feel free to follow along with the embedded video below.
If at any moment you’d like clarifications on why your ad was rejected please feel free to contact our 24/7 support team or consult our rules and regulations.
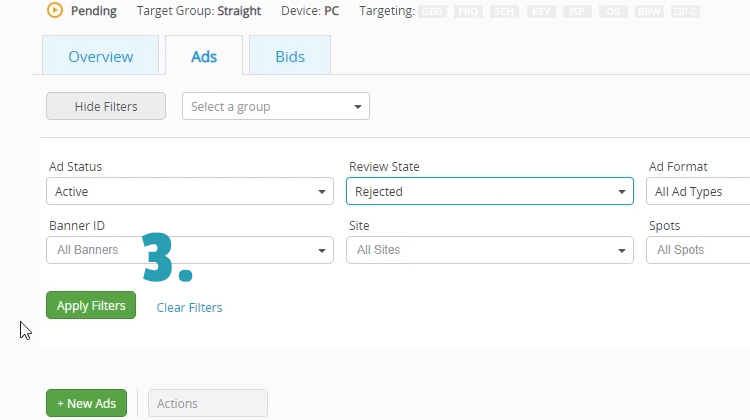
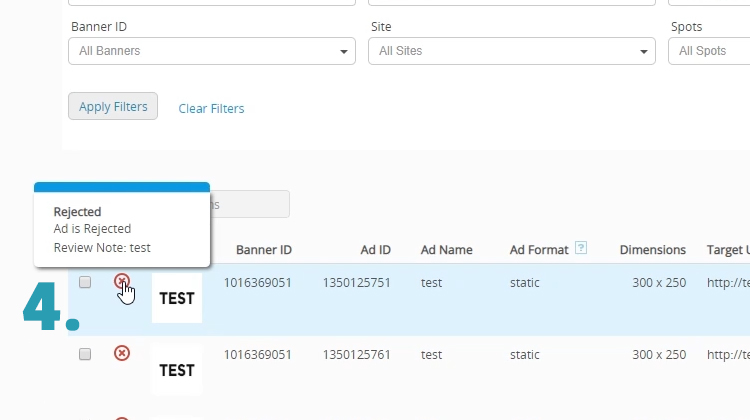
While it doesn’t feature the fancy voice-over you’ve grown accustomed to with our latest YouTube efforts you can check your rejected reason in four easy steps:
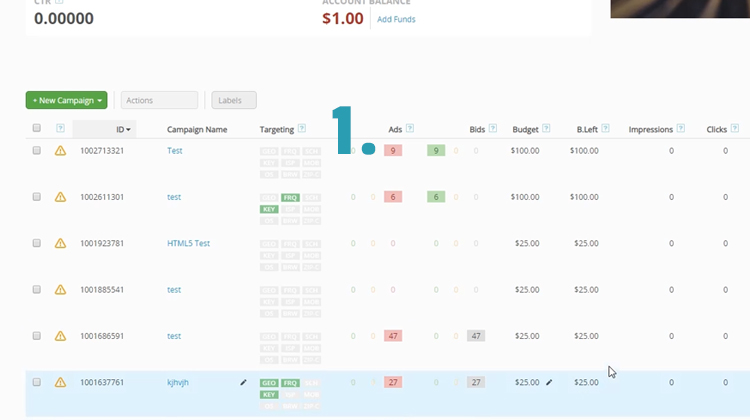
From your dashboard, go to the ads column and click on the red square for your campaign of choice
On the next page, select ‘Rejected Ads’ from the ‘Review Ads’ filter
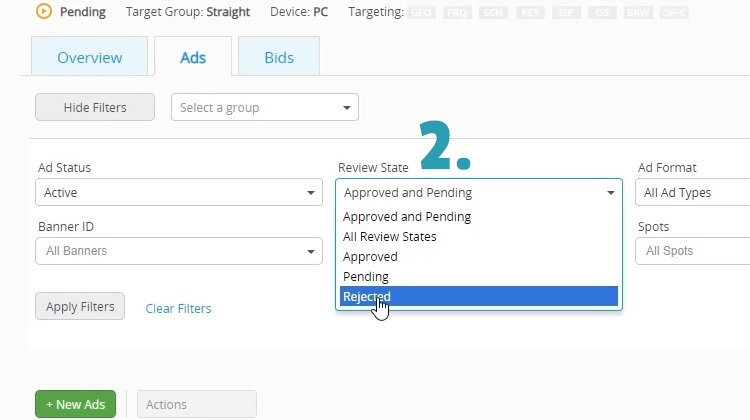
Click on ‘Apply Filters’
Hover over any of the red ‘X’ circles in order to see the review note for your ad
That wasn’t too hard, now was it?