We are excited that TJ DSP is finally live and replacing the engine of the TrafficJunky Campaign Manager. Through our RTB-enabled platform, advertisers can now automatically purchase ad space on our premium publisher websites, making it the official move of TrafficJunky towards programmatic advertising. Let’s get you started on how to create campaigns on the Campaign Manager.
What’s new on TrafficJunky?
We are giving you more powerful resources, functionalities, and extra features for better performance! You can automate your campaigns with the new Auto-Pilot feature and use optimization tools to improve campaign performance.
Introducing a new resource:
- Media Library
The Media Library modernizes the creative(s) upload and storing process to save time and scale campaigns. Uploaded creatives are stored in the Media Library. Once approved, the creative can be used in multiple campaigns, allowing you to speed up the campaign creation and get the campaign live as soon as it is created.
You can create a campaign in less than 5 minutes with the new campaign creation flow.
Let’s show you how to get started!
1. Uploading ad creatives
Uploading creative(s) to the Media Library is a necessary action before starting a new campaign. Media Library makes it easy for you to upload, store, and manage all creatives in a single place. The page consists 3 ad format tabs: Static Banner, Video Banner, Overlay logo.
After signing in to your TrafficJunky account:
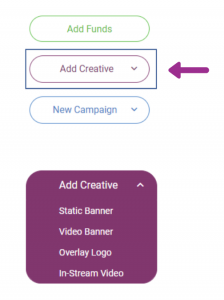
- Click the “Add Creative” button on the left-side menu of the Dashboard.
- Select the format you want to upload, which will then take you to the designated ad format tab in the Media Library.
- Upload your creative(s) and wait for approval. Note: Approval takes upwards of 3 hours.
Check the guide to uploading your creatives article and learn more on how to check the status of your creative in the Media Library.
In some cases, creatives get rejected on our platform due to advertising compliance issues and rules & regulations. Learn more about the ad creative rejection reasons and how to check creatives that get rejected.
Approved creatives will be available for selection during campaign creation.
2. Start a New Campaign
Once the creatives are approved, you can start the campaign creation by clicking the “New Campaign” button and then select “Bid” from the dropdown list.
The campaign creation process is broken down into 5 steps:
1) Create a Campaign – Select basic settings, set schedule, define the target audience, choose ad placement, and defining Autopilot setting.
2) Create ad(s) – Select ad type and select creatives from Media Library.
3) Set a Budget – Set daily budget and maximum bid.
4) Optimize – Further optimize the campaign—activate bidder, set rules, and decide on manual source selection if needed.
5) Manual source selection – Manually select the source the campaign will target if Manual Source Selection is turned ON in the previous step.
3. Determine the Basic Settings
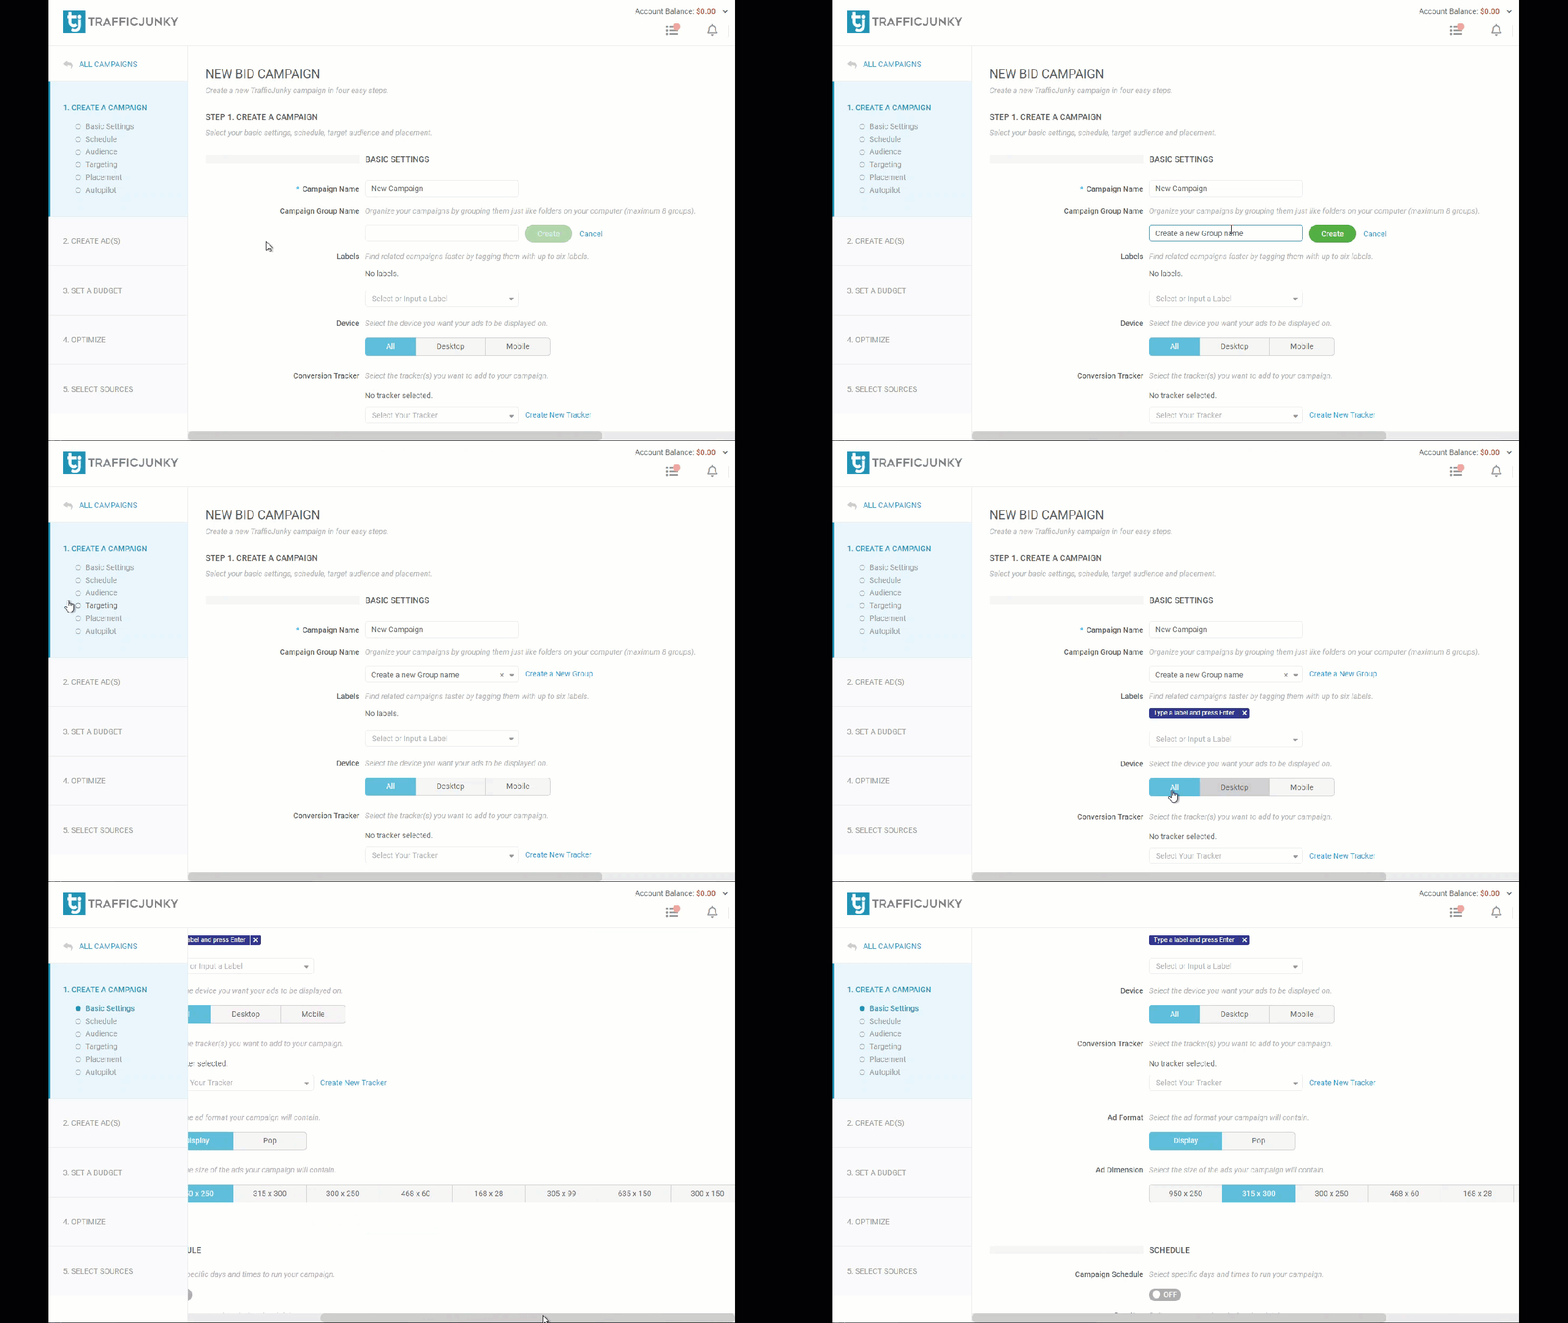
After choosing a bid campaign, you enter Step 1: Create a Campaign area, where the campaign settings are selected. Ensure creatives have been uploaded in the Media Library and approved before starting the campaign creation process.
On the left hand, the side menu shows the progress of this campaign creation. This Progress Menu will indicate what has been completed in the campaign creation process and what is to be done next.
On the Create a Campaign page, type in the Campaign Name before going to the next step.
Organize campaigns by naming the Campaign Group Name and Labels in Basic Settings to help search and access them faster, later.
A Campaign Group Name is just like a folder on the computer to sort files (in this case, campaigns) by their category. Any unsorted campaigns will directly go into the General group. You can create up to 8 new Groups.
Remember, a campaign can only have ONE Campaign Group Name but can have MULTIPLE Labels.
Add a conversion tracker in the campaign if needed. The conversion tracker gives you the ability to measure the ROI and track the entire sales funnel from ad impressions to conversions. Check stats in the Conversion Tracker tools to understand campaign performance. If a conversion tracker is not selected in this step, you will not be able to use the new autopilot and bidder feature in the proceeding steps.
Select the ad format and ad dimension. Please note that on the next step of campaign creation, users can only select creatives based on the ad dimension selected in step 1.
After that, move on to apply targeting features in your campaign.
- Demographic targeting
Introducing a new feature! Using this feature, you can select audience options by Male or Female, or All.
- Geo-targeting
Mandatory feature for all campaigns. This feature is a required selection during campaign creation. On our upgraded platform, you can only target one country per campaign. Additionally, you can add a maximum of 50 regions and cities per country. After choosing the target country, region, or city, select the Add button to confirm the selection.
- Autopilot
Introducing another new feature! Turning Autopilot ON will allow our algorithm to automatically adjust the rate at which the creatives appear based on their performance. Note: The campaign must have a conversion tracker to enable Autopilot.
Add additional targeting features to target the desired audience for your campaign.
Ad placement is an essential factor to consider. It determines which source the creative would show. Examples of ad placements would be: Above the fold, Below the fold, and Fullscreen.
After determining basic settings, click “Save and Continue.”
4. Select Creative
The next step is Step 2: Create Ad(s) page. After adding the Target URL, select creatives for the campaign by clicking on the “Select Creative(s) button.” A window will pop up that will show all the approved creatives available in the Media Library that match your campaign settings.
The window will only show creatives based on the ad format, ad dimensions, target group, and browser targeting settings selected in Step 1 of the campaign creation process. Settings determined in the previous section affect the selection of the creatives in this section. If a creative is not showing in the window, that means the creative is still Pending approval.
Here’s a scenario:
If a user targets All Browsers (including Chrome), and the creative that was uploaded previously in the Media Library got flagged as non-compliant for Google Standards, then the creative cannot be used in campaigns that target Chrome. Users must go back to Step 1, target All but Chrome during browser targeting to use that creative for that campaign.
Click on “Filters” to see creatives that are approved but do not match campaign settings. Otherwise, please go to the Media Library to submit new creatives or view the status of the ones you have already submitted for approval.
Select the creative(s) and Confirm Ad(s). The creatives will get attached to the campaign. Then click “Save & Continue” to move on to the next step.
5. Set the Budget and Max Bid
Determining the budget and bid amount of a campaign is an important decision you have to make the campaign worthwhile to reach the advertising needs. Step 3: Set a Budget; set the maximum daily budget and set the highest bid per source.
Click “Confirm Campaign” to move on to the next step.
6. Optimize the Campaign
Remember we mentioned at the beginning that we are giving advertisers more powerful tools and features? Step:4 Optimize, in campaign creation, is where the magic happens!
Here, advertisers will find 3 new features: Bidder, Rules, and Manual Source Selection. These will facilitate campaign optimization.
Let’s break down what each of these features does.
- Bidder
The Bidder allows setting a Target CPA for the campaign and the option to set Per Source Test Budget. Use the toggle to turn ON and enable bidder.
The Target CPA is the average amount of money you are willing to pay for a conversion. Enter the dollar amount of Target CPA, which our algorithm will converge towards. We recommend that advertisers use the average eCPA from the previous months to start.
Per source test budget fetches stats for the algorithm to optimize campaigns. Think of the test budget as the initial stage where you collect data for the algorithm to optimize the data and campaign performance. Generate enough data so that the algorithm can have enough data points to work with. We recommend Test Budget to be at least 4 times the Target CPA. The stats will help you determine the right Target CPA amount in the future to reach the sweet spot of cost per acquisition from each conversion.
Note: To enable the Bidder feature, users must have a conversion tracker selected in Step 1: Create a Campaign.
- Rules
Campaign rules are the way to control the algorithm’s execution of the campaign to indicate what you want to include and exclude as seen fit. Select the rules to apply to the campaign that will optimize the source targets. To create a new rule, click on “Create new rules,” and a new page will open. Set logical steps that, if true, the goal of the rule will be executed.
- Manual Source Selection
This functionality allows you to include and exclude sources manually on Step 5 of campaign creation. By turning ON manual optimization, target specific sources and edit the CPM.
Note: If the Bidder feature is turned ON and the Manual Source Selection is turned ON, you will not be able to edit the CPM in Step 5. They can only include and exclude target sources. To be able to edit CPM, users need to turn OFF Bidder.
If you turned OFF the Manual Source Selection, click “Save Campaign,” and the campaign will go live immediately. This selection cannot be changed/edited after the campaign is live.
If the user turned ON the Manual Source Selection, click “Save & Continue” to move on to the next step.
7. Select Sources
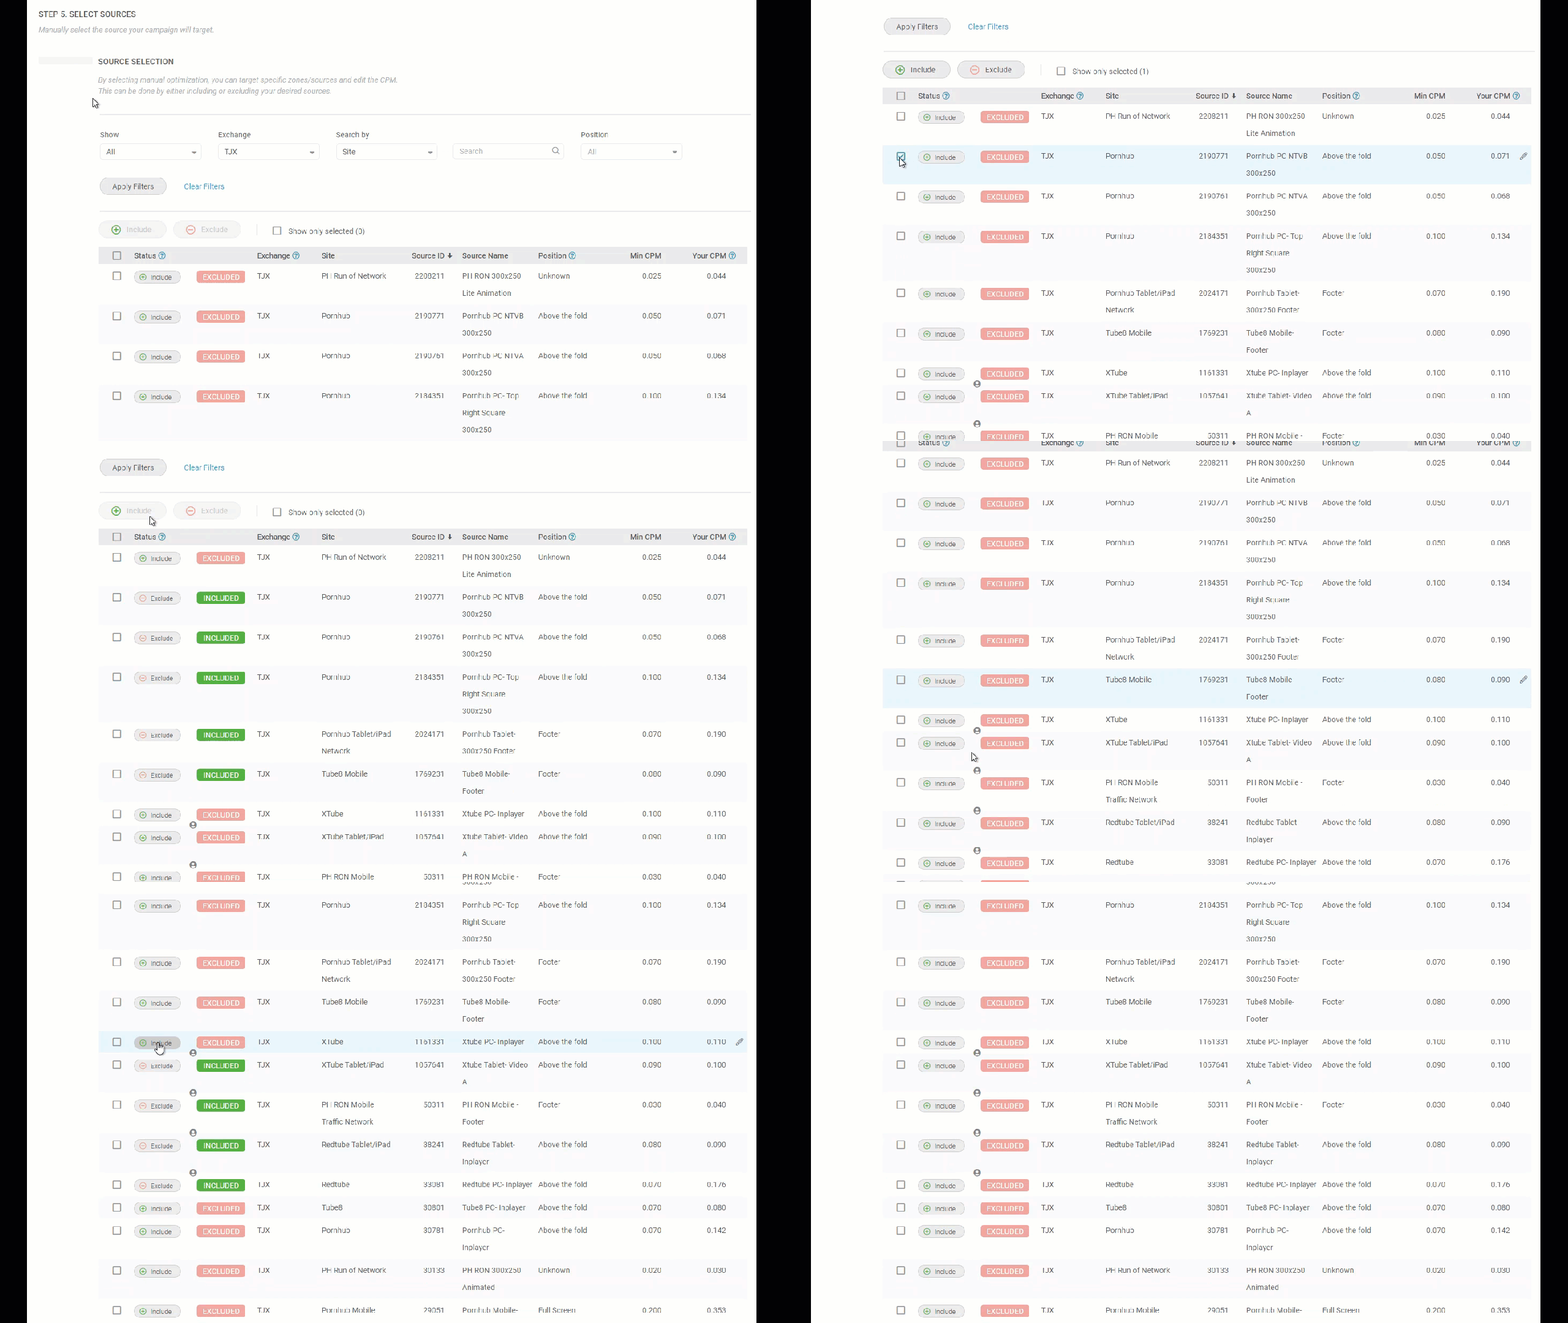
Step 5: Select Sources is the final step of the campaign creation process. By selecting manual optimization, you can target specific sources, ad positions on our publisher sites and edit the CPM.
Manually include or exclude sources from the table.
Please refer to the right side of the table to edit CPM, where it says, “Your CPM” that by default will show the recommended bid.
Click “Save Campaign,” and the campaign is successfully created. Then, you will be redirected automatically to the Campaigns page to see an overview of all the account campaigns.
That’s all!
With an evolved platform, you are expected to benefit from every feature and functionality available on our platform to meet your advertising goals and get ROI from campaigns created. We have streamlined processes, improved our platform and technology to fulfill the advertisers’ wants and needs. Enjoy the new benefits of our evolved platform and the programmatic functionalities of TJ DSP and maximize the impact of advertising!
Not a user? What are you waiting for? Sign-up to TrafficJunky today!

