Did you know that your campaign can go live immediately after you set up the campaign? Well, good news: now it’s possible, and we’ll show you how to. Uploading creatives in the Media Library is a necessary action before starting to create a campaign. After creatives are uploaded and approved, they will be available for selection in campaign creation, if they match the campaign settings. Therefore, your campaign will go live right away! This process saves you time and increases productivity for all future campaigns.
Organize your creatives based on their format. You can upload static banners, video banners, and overlay logos in the Media Library’s respective tabs.
For display campaigns, make sure the creatives match the following ad dimensions: 950 x 250, 315 x 300, 300 x 250, 468 x 60, 305 x 99, 635 x 150 and 300 x 150
Available ad formats: Static Banner, Video Banner, Overlay logo, and In-Stream Video.
Get started with Uploading Creatives
- Sign in to your TrafficJunky account
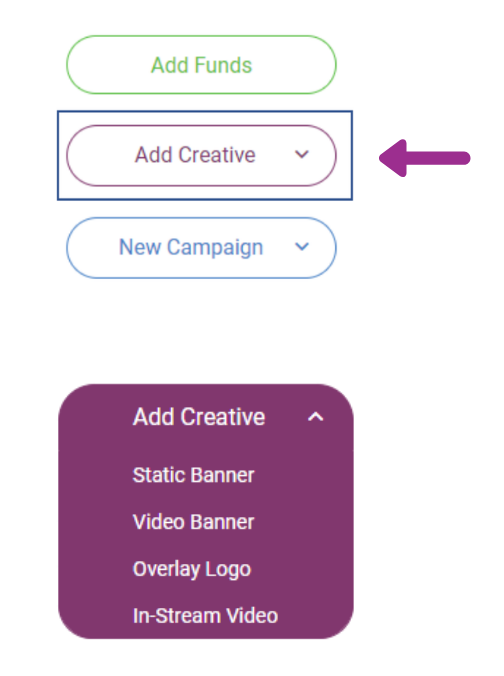
- On the left-side menu of the Dashboard, click the “Add Creative” button. A dropdown will show the following ad formats: Static Banner, Video Banner and Overlay logo.
- Select the format you want to upload, which will then take you to the designated ad format tab in the Media Library.
- Upload Your Creative(s) and wait for the approval. Note: Approval takes upwards of 3 hours.
How to check your uploaded creatives
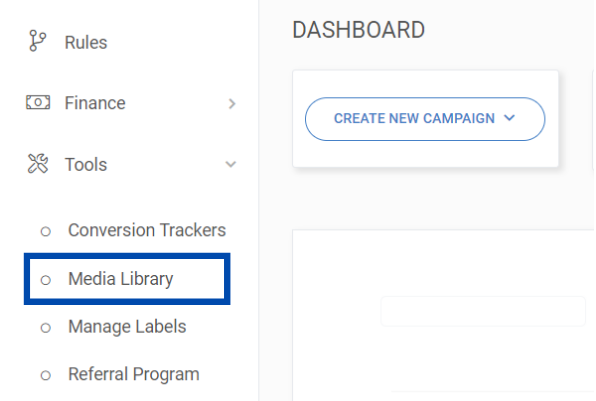
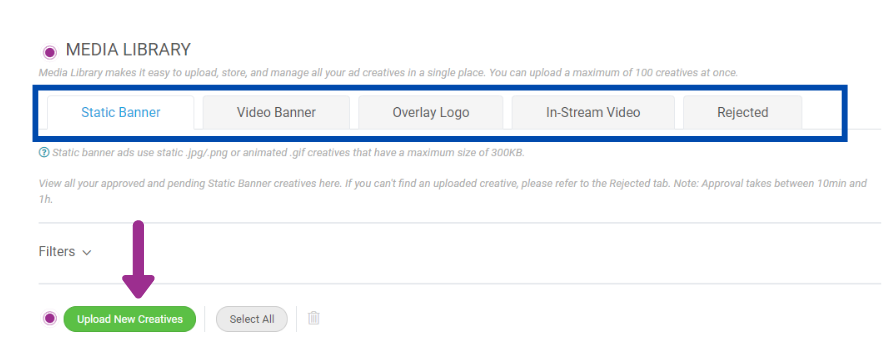
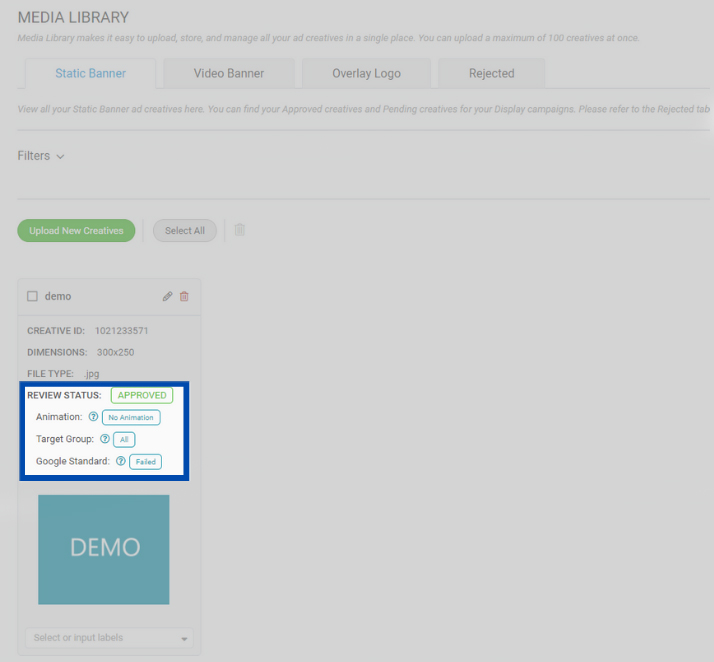
Access the Media Library under the Tools section of the left-side menu. You will find your creatives in the designated tabs of the Media Library based on the ad format. All the creatives uploaded will have a review status as “Pending” or “Approved.”
After a creative gets approved, you’ll notice 3 flags above each: Animation, Target Group, and Google Standard. We flag creatives to make sure creative specifications match the campaign settings and that’s how your campaign goes live immediately.
Animation flag
Animated creatives are effective for storytelling to engage with an audience.
Full animation– means the creative can be like a video with fluid animation. Animations that are too fast or blinking are not allowed on our platform. Refer to this article for examples.
Light animation– means that animations with a minimum of 2 seconds between frames. Refer to this article for examples.
No Animation– means a static image creative.
We label creatives with an animation flag because animated ads won’t run on sources that don’t accept animation. Refer to the Rules & Regulations page.
Target group flag
The target group determines the audience (Straight or Gay) who would be viewing the ad creative. When creatives get reviewed, they get assigned to Target group flags: Straight, Gay, or All.
In the campaign manager Step 1 (Create a Campaign), you can select the audience you want to reach with your campaign, based on the target group: Straight or Gay.
If your creative gets flagged for the Straight target group, then you will be able to use that creative for Straight campaigns only. The same rule follows for the Gay target group. Alternatively, if the creative gets approved for All, you can use it in all campaigns.
Google Chrome compliance flag
If you want to run campaigns that target Google Chrome with Browser targeting, the campaign’s creative(s) must comply with Google Abusive Ad Experience. Creatives in the Media Library will get assigned a Google Standard flag as Passed or Failed.
The following reasons are considered to constitute an “Abusive Ad Experience” by Google Chrome:
- An ad that resembles site warnings or error messages
- An ad that simulates messages, dialog boxes, or request notifications
- Ad depicting features that do not work
- An ad that displays close buttons that do anything other than closing the element when clicked
- An ad that shows misleading calls-to-action
- An ad that displays countdowns
- An ad with a play button
Creatives that passed Google Standard will be available for selection on campaigns that target Chrome specifically or all browsers. Creatives that failed won’t be available for selection for those campaigns, and you should exclude Chrome from Browser targeting in Step 1 of the campaign manager.
Don’t worry if your creatives get rejected. Learn how to check rejected creatives and their reasons to make sure all your creatives are compliant with the platform rules & regulations.
After creatives are approved and you’re ready to set up your campaign, follow steps 2 to 7 on how to create campaigns on the Campaign Manager.
Happy Advertising!